
Build Process

Building the log cabin walls
Take your parts list and ensure that you have stacked all the wall logs as near to their correct position around the base of the cabin. You will find the number and size of the wall logs on your parts list and the necessary drawings to help you locate the correct position of each wall log.
Important! – If your cabin has a veranda, please read “Building the veranda and decking” section first as you will need to cut a number of logs in the main cabin.
Start building the wall logs in accordance with the drawing on your parts list. Start with one layer of wall logs at the front side; continue with one layer at the back wall and then the logs to make up the side walls. Note – the half layer wall logs should be secured to the pressure treated bearer using screws.
The wall logs are always placed with the tongue towards the top and the groove towards the bottom.
Use a heavy rubber mallet or lump hammer to make sure that the tongue and groove of the wall logs fit perfectly. To avoid damaging the logs during installation, place the special knocking block log provided onto the tongue of the wall log and hammer down onto this instead of directly onto the wall log.
Repeat this order until all necessary wall beams are installed in accordance with the drawings on your parts list. You may prefer to add in the door and window frames as you build the log cabin walls up.
There is no requirement to glue or screw the logs to each other, all the joints are assembled dry.
It is important to lower the logs into their joints evenly a little at a time at each end, so it is always best to have someone to help at the other end.
If you have chosen a larger size cabin, it is possible that there will be a join where two log lengths meet. Ensure that you seal these logs with silicon in the join as you build.

Lay out the first level of logs and ensure they are square
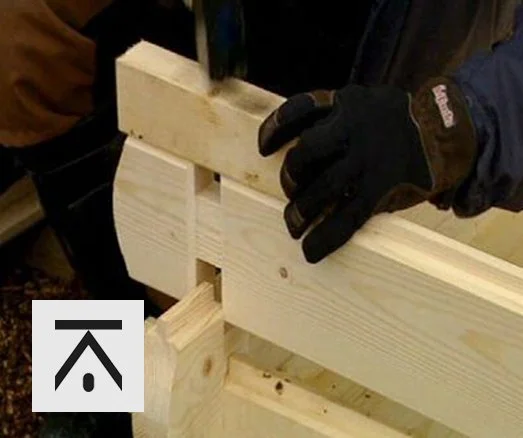
Avoid damaging the logs, use a piece of building log to hammer down on

Build the walls up layer by layer